Circular Plaited Herringbone Stitch
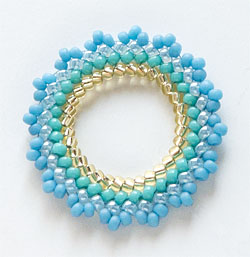
Method of Weaving Circular Plaited Herringbone Stitch
-
Materials: seed beads (size 11/0), needle, thread
-
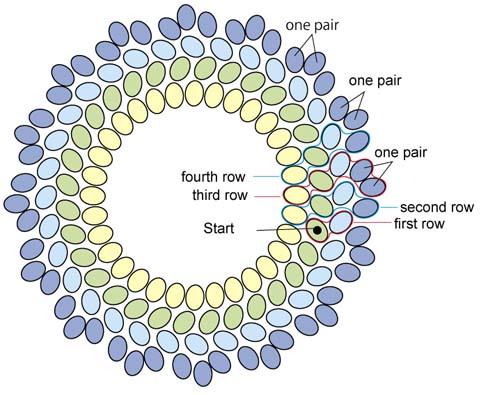 Rows and columns of a basic circular form are shown in the left figure. The columns are color-coded with four different colors.
If this is your first time working in the circular version, using four colors beads as shown in the figure will be helpful for your understanding.
-
 Weave a Circle
Figure 1.
String two beads on a manageable length of thread and leave a 10-in. (25cm) tail. Go back through the first bead (#1) toward the start and go through the second bead (#2) as shown in Figure 1. The first row has been completed. The thread will show around bead #1. -
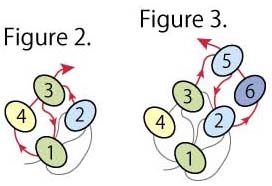 Figure 2.
Pick up bead #3 and go down through bead #1. Then, pick up bead #4 and go up through bead #3.Note
Keep the tension of your thread tight, but not too tight. If your thread is loose, your piece will have gaps between beads and loose its shape.
Figure 3.
Pick up bead #5 and go down through bead #2. Pick up bead #6 and go up through bead #5. The second row has been completed. -
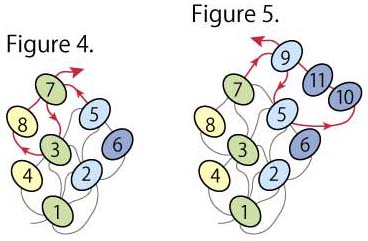
Figure 4.
Pick up bead #7 and go down through bead #3. Pick up bead #8 and go up through bead #7.Figure 5.
Pick up bead #9 and go down through bead #5. Pick up beads #10 and #11 and go up through bead #9. At the same time, pull bead #10 outward a little so that beads #6, #10, and #11 will form a chevron edge. The third row has been completed. -
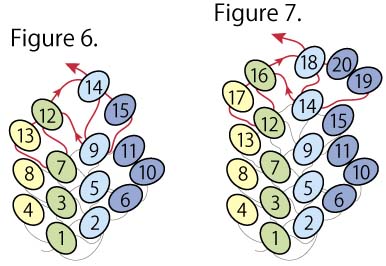 Figure 6. and Figure 7.
Repeat the method shown with Figures 6 and 7, and it will curve gradually into a circle. -
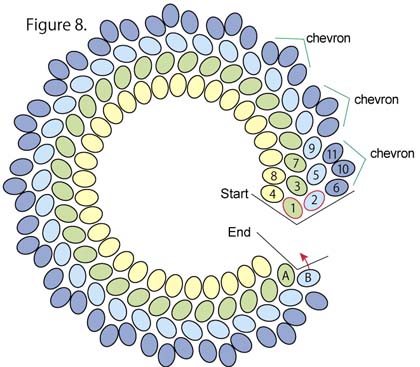 Figure 8.
You will need at least 16 chevrons on the outermost column to form a neat circle with rocaille seed beads. When you make a circular form with 16 chevrons, weave 32 rows as shown in Figure 8. Make sure that both the middle columns have 32 beads and the 16th chevron isn't complete yet. -
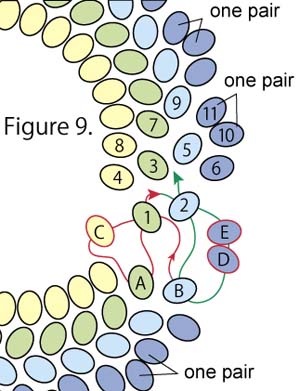 Figure 9.
The thread is exiting from bead B as shown in Figure 9. To connect the end to the start, do the following procedures.
Go down through beads #1 and A. Pick up bead C, and go up through bead #1. Go down through beads #2 and B. Pick up beads D and E, and go up through bead #2. Go up through all the beads in the innermost column after going down through bead #3.
Weave through a few more beads of the column, and pull the thread to form a flat circle. Don't pull the thread tightly. If you tighten the thread, it will get wavy.
-
Note
When you always add 15/0 seed beads on the innermost column and add 11/0 seed beads on the other columns, you can form a circle that has less rows than a circle all made of 11/0 seed beads.
Also, when you use seed beads of the same size and always add one pair of beads on each row of the outermost column, you can form a circle that has less rows than a circle made with the standard method.
The article about the circular and tubular versions of Plaited Herringbone Stith and the Pastel Flower Necklace appeared in Bead & Button magazine (February 2003, issue #53).
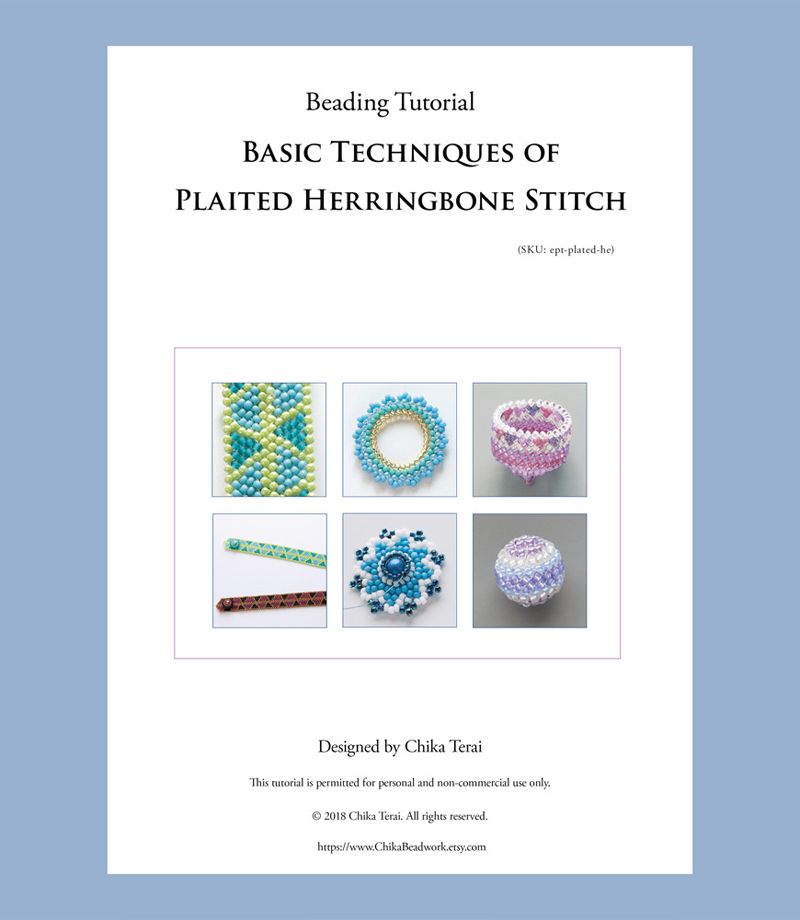
I explained the basic techniques of Plaited Herringbone Stitch in this tutorial. Additionally, I offered brief instructions for a triangular bracelet, a flower component, and a beaded ball as applications of the stitch.
Aside from this tutorial, I offered plaited herringbone stitch projects with step-by-step instructions.


